Presentation Mode on Projectors: 12 Days of Hanutech, Day 7
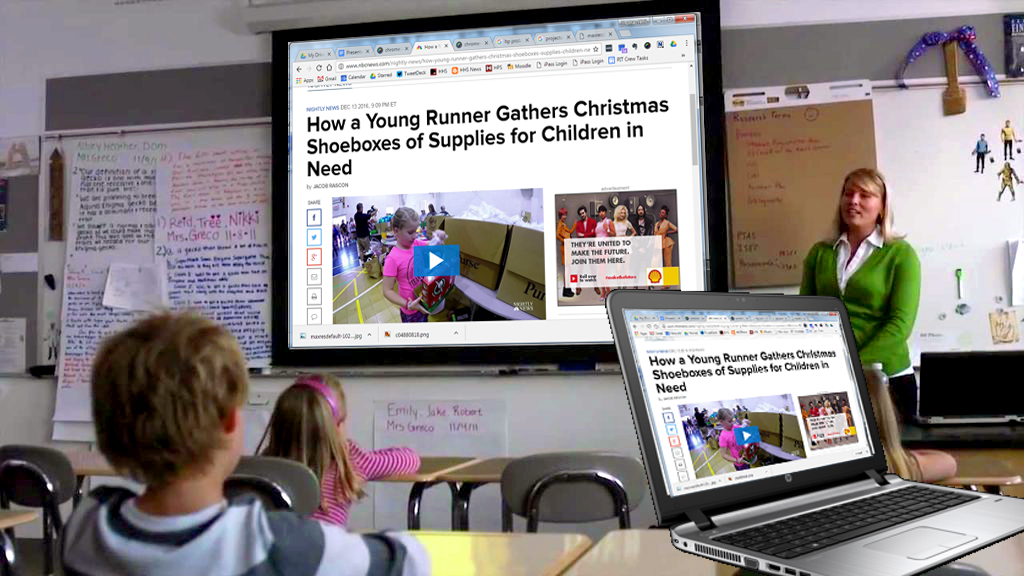
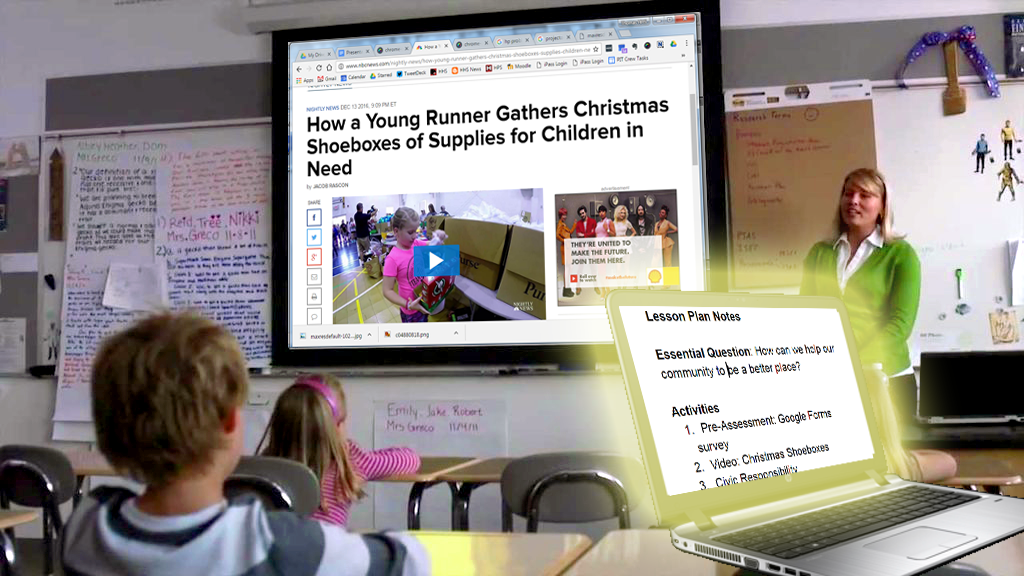
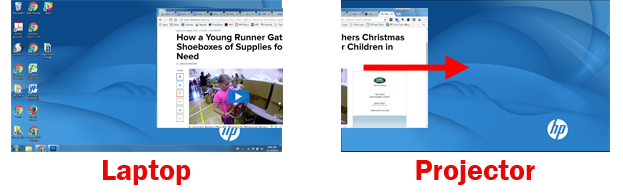
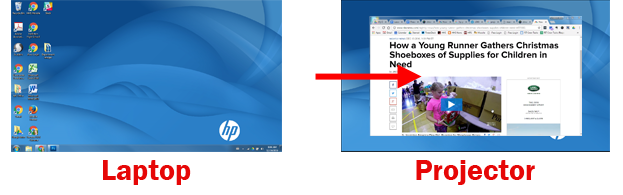
When your laptop is connected to a projector, it usually projects a copy of your laptop screen. However, most teachers don’t realize that the projector can act like a second screen that shows different stuff.
This is a feature built right into your laptop, it is easy to set up, and it is super dooper useful.
- Display lesson plan notes while showing PowerPoint/Google Slides.
- Keep resources prepped and ready for later use in the lesson
- Get work done while students are watching a video
- Keep your email open without the students being able to see it.
Keep reading for setup instructions for your HP laptop or Mac.
Setup
On your HP Laptop…
- Plug in your projector and turn it on (don’t skip this step).
- Go the Start Menu and choose All Programs > Accessories > Connect to a Projector
- Choose the Extend option.
This treats your projector like second screen that is attached to the “right” of your laptop.


- Drag items from the “left” laptop screen onto the “right” projector screen.

On a Mac….
- Plug into the projector (don’t skip this step).
- Go to the Apple Menu and choose System Preferences > Display
- Choose Arrangement
This only appears of a projector is plugged in. - Uncheck Mirror Displays


Comments
Post a Comment